Showing posts with label dessert. Show all posts

Wednesday, July 29, 2009

Baked Peaches with Vanilla Rice Pudding

I came across this recipe on Tastespotting through a much more beautiful picture than I've taken here. Rice pudding reminds me of being a child, which is funny, because most of the reactions I've gotten to rice pudding are "gross," "mush," and "old people food." Often with raisins added, I loved the sweetness and mix of textures that rice pudding provided. I also, not surprisingly, liked tapioca pudding when others were screaming "Ew! Fish eyes!"

This recipe takes a more adult approach to rice pudding, using jasmine rice, adding vanilla, and serving it in a baked peach. The result is sweet and soothingly fragrant when it comes out of the oven. And, the left over rice pudding is enjoyable, hot or cold, on its own.
Baked Peaches with Vanilla Rice Pudding

4 large peaches or 6 small peaches
1/2 cup cooked jasmine rice
1/4 cup cream
1 TBS sugar
1 tsp vanilla
nutmeg

Preheat oven to 350 degrees. To the rice, add cream, sugar and vanilla. Cut peaches in half and remove pits. Spoon rice mixture into each peach half, place in a baking pan, cover with foil and bake for 20 minutes. Top off with a dash of nutmeg.
Enjoy!

Saturday, July 11, 2009

Summer Berries and Ice Cream

Nothing says summer more than fresh berries and ice cream. Marinating the berries in a blend of balsamic vinegar and sugar gives this classic refresher a grown-up punch.

Yes, you can marinate berries! For a great ending to a summer barbecue, try using this berry salad as a topping for your favorite ice cream or creamy gelato.

Enjoy!

Monday, July 6, 2009

Food Truckin': Sweetflow Mobile


Something the DC street food scene has recently been energized with is the emergence of a few new food carts (or trucks as is the case with Sweetflow Mobile and Fojol Bros.) Of course, there have always been the standard hot dog vendors who also serve pretzels, candy and a variety of beverages out of white coolers (most big cities have those). And, there are the two competing burrito carts - one at 17th and K and Pedro and Vinny's two blocks down on 15th. But, Sweetflow fills a much needed void in the realm of street food: dessert. Specifically, frozen yogurt. Breaking boundaries by using fresh, organic ingredients, the concept of "street food" is elevated to a higher level. Plus, it is environmentally friendly. Brought to us by the folks behind Sweetgreen, their trucks are "uniquely engineered to run without a generator, thus significantly reducing the amount of fuel consumed." Sweetgreen, indeed.

I recently found Sweetflow at MacPherson Square thanks to Twitter. Tim regularly posts a heads-up to his whereabouts and what time he'll be there. When I showed up, he gave me a great introduction to his product - refreshingly tangy yogurt from Stoneyfield Farms, frozen, fat-free, and containing those all important live and active cultures. Then, topped with your choice of fresh, local ingredients, including fruits and crunchy toppings such as nut and granola. My selection: yogurt topped with mango, blackberries and coconut. It was so good and so fresh I felt like I could be on a tropical island. The yogurt was cool and creamy, tangy but not puckering, and surrounded by the perfect portion of fruit that appeared to be picked at its height of ripeness.

A small cup costs $5, but was not at all skimpy in size. The portion, I felt, was actually generous. For something so refreshing and healthy, it was worth it.
Location: varies. Follow @SweetflowMobile on Twitter for up to date locations.


Wednesday, June 10, 2009

Mini Strawberry Cheesecakes

Yum, yum, yum! This was my first attempt at cheesecake, albeit in miniature form, and I must say I was quite impressed. The recipe comes from Cupcakes by Shelly Kaldunski

These bite-size morsels of deliciousness were very easy to make and the fresh strawberry topping added the perfect fruity finish. Of course you could really use any fruit or berry, softened in the same manner, for the topping. Strawberries worked well for summer, but I bet pear would be delicious in the fall.

Next time I make this recipe, I might consider adding a chocolate or graham cookie crust at the bottom of each paper liner. Chilling helped hold the whole thing together, but I think a crust would help even more. 

Mini Strawberry Cheesecakes

Topping:
1 lb fresh strawberries, hulled and cut in half
1/2 cup plus 2 TBS sugar
1 TBS fresh lemon juice

Filling:
1 1/4 lb cream cheese, at room temperature
3/4 cup sugar
1/2 tsp vanilla extract
1/4 cup sour cream
2 large eggs, at room temperature
3 TBS all-purpose flour

makes 24+ mini cupcakes


To make the topping, combine 1/2 pound of the strawberries with the sugar in a non-reactive saucepan. Use a fork to gently mash the strawberries. Cook over medium-high heat until the strawberries are softened, about 3 minutes. Remove from the heat and stir in the remaining 1/2 pound strawberries and lemon juice. Transfer to a small bowl and cool completely. (The topping can be refrigerated in an airtight container for up to 2 days.)

Position rack in the middle of the oven and preheat to 350 degrees F. Line a 24-cup miniature muffin pan with miniature paper or foil liners. To make the filling, in a bowl, using an electric mixer on medium-high speed, beat the cream cheese until fluffy, about 3 minutes. With the mixer on low speed, gradually add the sugar and beat until smooth; scrape down the sides of the bowl as needed. Add the vanilla and sour cream and beat until combined. Add the eggs, one at a time, beating well after each; add the flour and beat until combined.

Divide the cream cheese filling evenly among the prepared muffin cups, filling each about 3/4 full. Bake until the cheesecakes are just set in the center, about 15 minutes. Let the cheesecakes cool in the pan on a wire rack for 5 minutes. Using a small offset spatula, transfer the cheesecakes to the wire rack and let cool completely, about 45 minutes.

Refrigerate cheesecakes in an airtight container at least overnight or for up to 3 days. Spoon about 1 TBS of the strawberry topping onto each chilled cheesecake and serve right away.
Enjoy!

Tuesday, June 9, 2009

Berry Salad with Balsamic Sugar Sauce


We've had a few hot (and thunderstormy) days around here lately and I felt like I needed a little pick-me-up. There's nothing quite like being oh so ready for sunshine and the weather having different plans. I craved something that felt like summer and that provided refreshment from the hot and muggy outside. Fresh, chilled berries seemed like just the cure!  

I did a little internet search and came up with this recipe, courtesy of Ina Garten (aka The Barefoot Contessa) and foodnetwork.com. I substituted blackberries for the raspberries because I couldn't find them and used a touch less sugar than the recipe calls for. It was just what the doctor ordered and a huge hit with my friends, too. I've made this twice now and it is just as good alone or as a topping for tangy Greek yogurt. I bet it would be delicious with ice cream, too.
Berry Salad

1 pint strawberries, hulled and cut in half
1 pint blueberries
1 pint raspberries
1 TBS good balsamic vinegar
1/4 cup sugar
fresh mint for garnish

Place 6 glasses in the refrigerator.

In a large bowl, combine the berries, vinegar and sugar. Stir gently. Cover with plastic wrap and refrigerate for 30 minutes to 1 hour.

Spoon the berries into chilled glasses and garnish with mint.
Enjoy!

Monday, March 30, 2009

Black and White Cupcakes with Gooey Chocolate Glaze

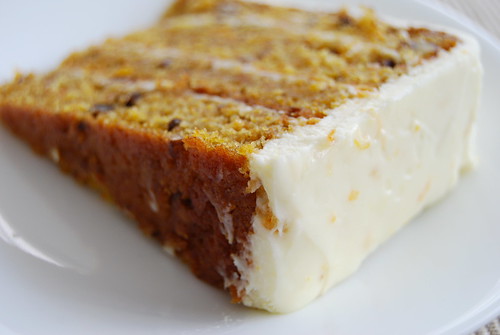
I received a new cookbook for my birthday, simply titled Cupcakes by Shelly Kaldunski (sold at Williams-Sonoma). As if there aren't enough cupcakes to be had at all of the cupcake bakeries cropping up in D.C., at $3 a pop I've been interested in trying to make my own. Baking has never really been my "thing", in fact just today I learned there was such an ingredient as cake flour. (Which, incidentally, seems to make all the difference.) 

I've always been a big fan of the black bottom cupcakes at Starbucks - a mix of chocolate cake and cheesecake in cupcake form - so I was quite excited to see that my new cookbook has a recipe for Black and White Cupcakes. While the cream cheese did not quite settle in the center of the cake as I had hoped, the cupcakes looked good and had the combination of tangy and sweet flavors that I enjoy.
Black and White Cupcakes
makes 12 cupcakes

8 oz cream cheese, at room temperature
1 TBS sour cream
1 1/2 cups sugar
1 cup cake flour
1/3 cup unsweetened cocoa powder
1/2 tsp baking soda
1/4 tsp salt
4 TBS unsalted butter, at room temperature
1 large egg, at room temperature
1 tsp vanilla extract
1/2 cup whole milk

Preheat oven to 350 degrees with rack in middle position. Line a standard 12-cup muffin pan with paper or foil liners.

To make the cream cheese filling, in a bowl, using an electric mixer on high speed, beat the cream cheese until fluffy, about 2 minutes. Add the sour cream and 1/2 cup of sugar and beat until combined.

To make the cupcake batter, sift together the cake flour cocoa powder, baking soda, and salt into a bowl. In another bowl, using an electric mixer on medium-high speed, beat the butter and remaining 3/4 cup sugar together until light and fluffy, 2-3 minutes. Add the egg and vanilla and beat until combined. Add the flour mixture in 3 additions, alternating with the milk in 2 additions, beating on low speed until just combined; scrape down the sides of the bowl as needed.

Divide the batter evenly among the prepared muffin cups, filling each about half full. Spoon the cream cheese filling onto the center of each, dividing it evenly (the filling will sink into the cupcakes as they bake). Bake until the cupcakes are set in the center, around 15 minutes. Let the cupcakes cool in the pan on a wire rack for 5 minutes. Transfer the cupcakes to the wire rack and let cool completely, about 1 hour.


Gooey Chocolate Glaze
makes approx. 1 1/2 cups

2/3 cup sweetened condensed milk
8 oz semisweet chocolate, chopped
2 TBS unsalted butter, cut into 2 pieces

In a small saucepan, combine the sweetened condensed milk, chocolate, and butter. Warm over medium-high heat, stirring occasionally, until the chocolate is melted and the mixture is bubbly, 3-4 minutes. Remove the pan from the heat and let the glaze cool slightly before using. (The cooled glaze can be refrigerated in an airtight container for up to 5 days.)


Spoon the glaze over the cupcakes and top with chocolate curls or other decorations. The finished cupcakes can be stored in an airtight container and refrigerated for up to 3 days. Reheat in a 250 degree oven of 5 minutes before serving.
Enjoy!

Wednesday, March 11, 2009

Chocolate Bread Pudding


I. Love. Bread Pudding.

So, naturally, I was thrilled to see this recipe from Elyssa. It even reminded me that I have a few bread pudding recipes to post of my own. Elyssa points out the flexibility of bread pudding, being able to do many stages in advance, "The first time I made it, I did it in 3 days (toasting bread the 1st night, making custard and soaking the bread the 2nd, and baking/serving the 3rd night.)" So, here is Elyssa's recipe. Enjoy!


Chocolate Bread Pudding


Ingredients:

1 loaf (1 to 1 1/2 pounds) challah
1 3/4 cups (14 ounces) whole milk
1 3/4 cups (14 ounces) heavy whipping cream
8 ounces semisweet or bittersweet chocolate, finely chopped (I used a mixture of both bitter and semi sweet chocolate)
2 large eggs
2 large egg yolks
1 1/4 cups (8 3/4 ounces) sugar
Pinch of salt

Preheat oven to 325°F and position an oven rack in the center. Lightly butter the cake pan/baking dish (9 by 2-inch round or ceramic baking/casserole dish).

Toast the Bread: Use the serrated knife to cut away the crust from all sides of the bread. If you are using challah which is braided, just do the best you can and don’t worry about the bits of crust in the crevices of the braid. Cut the bread into 1-inch cubes. Spread the cubes on the baking sheet and toast in the over for 20 minutes. Transfer to a rack to cool. Measure out 4 cups of bread cubes and place them in the prepared cake pan. Transfer the remaining bread cubes to a resealable plastic bag and set aside for another use. [You can do this step on the first day if you want. Day old bread tends to soak the custard in a little better. But you can also do this the same day as the custard]

Make the custard: Heat the milk and cream in the medium saucepan over medium heat just until the mixture simmers. Remove the pan from the heat and add the chopped chocolate. Let it sit for 1 minute, then whisk vigorously to blend the chocolate into the mixture.

Temper the eggs: Whisk the eggs, yolk, sugar, and salt in the medium bowl to blend thoroughly. Pour about ½ cup of the chocolate mixture into the eggs, whisking constantly. Once blended, whisk in another ½ cup. Then slowly pour the rest of the chocolate mixture into the eggs, whisking constantly.

Soak the bread cubes: Pour the custard through a strainer over the bread in the baking dish. Cover the baking dish with plastic wrap and press down gently so that all the bread cubes are soaked with the custard. Refrigerate for at least 8 hours, preferably overnight. This gives the bread cubes plenty of time to soak up the chocolate custard, turning them from white to a deep chocolate brown color throughout. Every once in awhile, remove the plastic and gently stir the mixture, then return to the fridge.

Bake and Serve the Bread Pudding: Preheat the over to 325°F and position an oven rack in the center. Remove the plastic wrap from the pan and bake the pudding for about 60-75 minutes, until the center is set. To check, use a spoon to press down firmly in the center of the pan. The pudding is done when the center feels firm and no loose custard bubbles up around the spoon. Transfer to a rack to cool for about 15-20 minutes, then cut the warm pudding and serve. Top w/ a spoonful of whipped cream or caramel sauce if you want.

Note: The bread pudding can be baked up to 2 days in advance. Cool to room temp, then cover with plastic wrap and refrigerate. Reheat in a 325°F oven for 20-25 minutes, until heated through.

[Photo by CatalogThis, available under a Creative Commons Attribution-Noncommercial license.]

Monday, February 16, 2009

Chocolate Cupcakes with Cream Cheese Frosting


Our recent trip to Nashville, TN and our cupcake taste test inspired me to try making my own, and what a better opportunity to do so than Valentine's Day. I treated myself to a "Cupcake Kit" from The Chocolate Moose mainly to get the cute cupcake wrappers and pastry bag. It also comes with a recipe book with recipes for basic vanilla and chocolate cupcakes, cream cheese and chocolate frosting plus a handful of fancier cupcakes infusing fruits and other flavors. Below is the basic recipe for chocolate cupcakes with cream cheese frosting. I added the heart-shaped York peppermint patties as (edible) decoration.
Chocolate Cupcakes
Makes 12 (I halved the recipe, to make 6)
1 cup unbleached all-purpose flour
1/4 cup unsweetened Dutch process cocoa powder
1/2 teaspoon baking soda
1/4 teaspoon salt
1/4 cup (1/2 stick) unsalted butter at room temperature
1 cup granulated sugar
2 large eggs
1 teaspoon vanilla extract
1 teaspoon instant coffee granules dissolved in 2 teaspoons water
2/3 cup buttermilk (any fat content)
  • Sift the flower, cocoa powder, baking soda, and salt into a medium bowl.
  • In a large bowl, beat the butter and sugar with an electric mixture on medium speed until smoothly blended, about 1 minute. Scrape sides of bowl as needed.
  • Add the eggs one at a time, beating until each is blended into the batter and it looks creamy, about 1 minute. Mix in the vanilla and dissolved coffee. On low speed, add half of the flour mixture, mixing just to incorporate it. Mix in the buttermilk to blend in. Mix in the remaining flour mixture until it is incorporated and the batter is smooth.
  • Spoon the batter into cupcake liners set in a muffin tin and bake for 25 minutes at 350 degrees.

Cream Cheese Frosting
Makes 3 cups, for 12 cupcakes
1/2 cup (1 stick) unsalted butter, at room temperature
6 oz cream cheese, at room temperature
1 teaspoon vanilla extract
3 cups powdered sugar
  • In a large bowl, beat the butter, cream cheese, and vanilla with an electric mixer on low speed until smooth and thoroughly blended, about 1 minute. Scrape sides of bowl as needed.
  • Add the powdered sugar, mixing until smooth, about 1 minute, then beat on medium speed for 1 minute to lighten it further. 
  • Spread on cooled cupcakes.
Enjoy!

Thursday, January 1, 2009

Happy New Year!

Happy New Year to everyone and welcome to 2009! I hope you had a nice celebration last night. If your day is anything like mine, today is a lazy day of relaxing and eating lots of leftovers. We pulled out a few old time favorites and tried a few new dishes and as always, had way too much food. But, I did remember to take pictures of everything, so I am happy to share with you our New Year's Eve feast - complete with links to each recipe. Of course, the dishes can be made for any occasion and I know that I'll certainly be pulling these out again.

Enjoy!

Tomato, Mozzarella and Basil


(recipe provided and cooked by Betsy and flambeed by Mike!)


Monday, December 29, 2008

Cranberry Vanilla Muffins


I introduced my family to Beets and Bonbons this weekend (hi, everyone!) and I think I have a whole new audience.

This recipe comes from my mom and has been a Thanksgiving staple for as long as I can remember. It was probably the only cooking I ever did while growing up, and I looked forward to my role every year. At our house, the muffins are served as a side to the Thanksgiving feast, and double as a delicious breakfast the next morning.

Cranberry Vanilla Muffins
(from "Cold Weather Cooking" by Sarah Leah Chase)

Batter

1/2 vanilla bean, cut into small pieces
1 C sugar
1/2 C (1 stick) unsalted butter
2 large eggs
2 C unbleached all-purpose flour
2 tsp. baking powder
1/4 tsp. salt
1/2 C milk
2 1/2 cups fresh cranberries, coarsely chopped


Topping

2 Tbs. sugar
1/2 tsp. grated nutmeg

1. Preheat oven to 375 degrees F. Line 12-14 muffin cups with paper liners.

2. Prepare the batter: Place the vanilla bean and sugar in a blender or food processor and process until the vanilla bean is ground to tiny flecks.

3. Using an electric mixer, cream the vanilla sugar with the butter in a mixing bowl until smooth. Add the eggs one at a time, beating well after each addition.

4. Mix together the flour, baking powder, and salt. Add the dry ingredients to the creamed mixture alternately with the milk, mixing until smooth and fluffy. Fold in the cranberries.

5. Divide the batter between the muffin cups, filling each one almost full. Mix together the sugar and nutmeg for the topping and sprinkle generously over the muffins. Bake until puffed, light golden brown, and a toothpick inserted into the center of a muffin comes out clean, about 25 minutes. Serve muffins warm or at room temperature.

Enjoy!

Monday, December 22, 2008

Seeking: A Few Good Muffin Recipes


I received my first ever muffin pan last night for Hanukkah, and I'm really excited about it. Unfortunately, my cookbooks are quite lacking in muffin recipes. If anyone out there has one or two that they really love, I would be grateful if you wanted to pass it on. Email beetsandbonbons@hotmail.com and I'll get it up on the site right away!

Friday, December 19, 2008

Elyssa's Secret Carrot Cake

I love secrets. And I'm usually pretty good at keeping them. But, when I get the "green light" - watch out world! Especially when it comes to recipes. We all have our coveted family recipes and our secret ingredients that we can't live without. This one comes from Elyssa, and it sounds like a real time saver, particularly for people like me who are not so adept at baking.
I have decided to share my "secret" carrot cake recipe with the world. This cake has become a major hit among my friends and I'm pretty sure I get invited to parties and BBQs based only on this cake.

Why is it a secret? Because it comes from a cook book called "The Cake Mix Doctor." That's right...cake mix. (I can already hear my Mom saying tsk tsk). But I'm a busy woman. Sometimes I need some help...and you might as well be in on the secret. You would never know that cake mix was used in this recipe, mostly because of all the "real" ingredients like the fresh carrots and the homemade frosting. Enjoy!

Carrot Cake with Cream Cheese Frosting

Serves: 16

Prep Time: 10 minutes

Baking Time: 30-35 minutes

Assembly Time: 15 minutes


Ingredients
  • Solid vegetable shortening for greasing the pans or Pam spray
  • Flour for dusting the pans
  • 1 package (3.4 ounces) plain yellow cake mix
  • 1 package (3.4 ounces) vanilla instant pudding mix
  • 2/3 cup fresh orange juice
  • 1/2 cup vegetable oil
  • 4 large eggs
  • 2 teaspoons ground cinnamon
  • 3 cups grated carrots--about 5 medium carrots (if you own a food processor do yourself a favor and use it to grate the carrots. Otherwise a box cheese grater works well)
  • 1/2 cup raisins
  • 1/2 cup chopped walnuts
1. Place a rack in the center of the oven and preheat the over to 350 degrees. Generously grease two 9-inch round cake pans with vegetable shortening or Pam spray. Dust with flour, then shake out the excess flour. Sent the pans aside.

2. Place the cake mix, pudding mix, orange juice, oil, eggs, and cinnamon in a large bowl. Blend with an electric mixed on low speed for 1 minute. Stop the machine and scrape down the sides of the bowl with a rubber spatula. Increase the mixed speed to medium and beat 2 minutes more, scrapping the sides down again if needed. The batter should look thick and well blended. Gently fold in the carrots, raisins, and nuts with a rubber spatula. Divide the batter between the prepared pans, smoothing it out with the rubber spatula. Place the pans in the oven side by side.


3. Bake the cakes until they are golden brown and spring back when lightly pressed with your finger, 30-35 minutes. Remove the pans from the over and place on wire racks to cool for 10 minutes. Run a dinner knife around the edges of each layer and invert each onto a rack, then invert each again onto another rack so that the cakes are right side up. Allow them to cool completely, 30 minutes more.


4. Prepare frosting (see below).


5. Place one cake layer right side up on a serving platter. Spread the top with frosting. Place the second layer, right side up, on top of the first layer and frost the top and sides of the cake with clean, smooth strokes.

6. Place this cake, uncovered, in the fridge until the frosting sets, 20 minutes. Cover the cake with waxed paper and store in the fridge for up to 1 week.


Cream Cheese Frosting


Ingredients
  • 1 package (8 ounces) cream cheese, at room temperature
  • 8 tablespoons (1 stick) butter, at room temperature
  • 3 3/4 cups confectioners' sugar, sifted
  • 1 teaspoon pure vanilla extract
1. Place the cream cheese and butter in a large mixing bowl. Blend with an electric mixer on low speed until combined, 30 seconds. Stop the machine. Add the confectioners' sugar a bit at a time, blending with mixer on low speed until the sugar is well incorporated, 1 minute. Add the vanilla, then increase the mixed speed to medium and blend the frosting until fluffy, 1 minute more.

2. Use at once to frost the top and sides of the cake.

Sounds delicious. Thanks, Elyssa! Enjoy, everyone!

Thursday, December 18, 2008

Old Fashioned Apple Crisp

I'm really holding on to Fall. I hear about snow in the Mid-west and I know it is coming here soon. I can't help but bring out this recipe a few more times before it is too late. Of course, the apples are best picked yourself on a gorgeous Fall afternoon, but when the temperatures drop too low, the grocery store will just have to do.

This recipe comes from the Barefoot Contessa Parties! book. It's the oats that really make the dish!

Old Fashioned Apple Crisp

  • 5 pounds McIntosh or Macoun apples
  • Grated zest of 1 orange
  • Grated zest of 1 lemon
  • 2 tablespoons freshly squeezed orange juice
  • 2 tablespoons freshly squeezed lemon juice
  • 1/2 cup granulated sugar
  • 2 teaspoons ground cinnamon
  • 1 teaspoon ground nutmeg
  • 1 1/2 cups flour
  • 3/4 cup granulated sugar
  • 3/4 cup light brown sugar, packed
  • 1/2 teaspoon kosher salt
  • 1 cup oatmeal
  • 1/2 pound cold unsalted butter, diced

Preheat the oven to 350 degrees F. Butter a 9 by 14 by 2-inch oval baking dish.

Peel, core, and cut the apples into large wedges. Combine the apples with the zests, juices, sugar, and spices. Pour into the dish.

To make the topping, combine the flour, sugars, salt, oatmeal, and cold butter in the bowl of an electric mixer fitted with the paddle attachment. Mix on low speed until the mixture is crumbly and the butter is the size of peas. Scatter evenly over the apples.

Place the crisp on a sheet pan and bake for 1 hour until the top is brown and the apples are bubbly. Serve warm.


Enjoy!

Wednesday, December 10, 2008

St. Patrick's Day Brownies


Our forecast today is unseasonably warm and very very rainy. The kind of day that you just want to skip out on work, hole up in the apartment, watch movies and eat junk food. Although we're a few months away from St. Patrick's Day, today may have that rainy March kind of feel to it. And what better way to find satisfaction on an otherwise miserable day but through a Luck 'O the Irish Brownie? This one comes from my friend Jess (who also makes a mean lemon chicken - her Thanksgiving tradition). Sounds delicious and I can't wait to make them myself!

St. Patrick's Day Brownies
  • 4 (1 ounce) squares unsweetened chocolate
  • 1 cup margarine, softened
  • 2 cups white sugar
  • 3 eggs
  • 2 1/2 teaspoons vanilla extract
  • 1 cup all-purpose flour
  • 1/2 cup butter, softened
  • 4 cups confectioners' sugar
  • 2 tablespoons milk, or as needed
  • 1 1/2 teaspoons peppermint extract
  • 6 drops green food coloring
  • 1 1/3 cups semisweet chocolate chips
  • 6 tablespoons butter
  • 1 tablespoon vanilla extract
Preheat the oven to 350 degrees F (175 degrees C). Grease a 9x13 inch baking dish.

Melt the unsweetened chocolate in a cup or small bowl in the microwave. Stir at 15 second intervals until chocolate is smooth. Allow to cool slightly. Transfer to a large bowl, and stir in the margarine and sugar until smooth. Beat in the eggs one at a time, then stir in the vanilla. Stir in the flour just until blended. Pour the batter into the prepared dish and spread evenly.


Bake in the preheated oven until the surface appears dry and the sides are beginning to pull away from the edges of the pan, 20 to 25 minutes. The brownies may look more like cake and may jiggle slightly in the center- this is normal. Remove from the oven and cool in the pan set over a wire rack.


To make the middle layer, beat 1/2 cup of butter with confectioners' sugar in a large bowl using an electric mixer. Add milk as needed to get a spreadable consistency. Stir in the peppermint extract and green food coloring. Spread this over the cooled pan of brownies. Refrigerate for 30 minutes


In a microwave-safe bowl, microwave chocolate chips with the butter until melted. Stir every 20 seconds until chocolate is smooth. Stir in vanilla and then pour over the chilled brownies and quickly spread to cover the surface. Cool again until firm, about 10 minutes, then cut into squares and serve.


Yum! Enjoy!

Tuesday, November 25, 2008

Pumpkin Bread Pudding

This one comes from my friend, Betsy - an excellent cook! A light and fluffy custard dessert enveloping all of the tastes of the season. In my opinion, it is great for breakfast, too! Details here.


Blog Widget by LinkWithin